| |
6in1 Waterproof 4GB 8M Pixels HD Spy Watch Camera DVR w38
This is the first HD-DV Watch, you can shoot high-definition video, taking high-quality photos, recording high-quality audio, With simple operation, elegant design, small size, it is easy to carry. It is an essential utility in business, education, security, media, justice, tourism, health care, living and other field.

|
Item |
Parameters |
|
Video format |
AVI |
|
Video encoding |
M-JPEG |
|
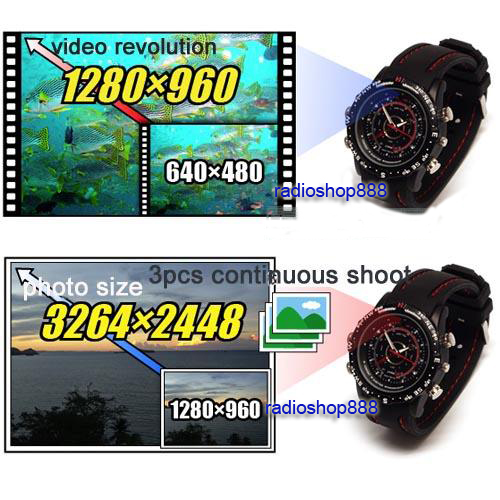
Video resolution |
1280*960VGA |
|
Video frame rate |
30fps |
|
Media playing software |
Attached software of the operating system or Mainstream audio and video media playing software |
|
Picture format |
JPG |
|
Picture pixels |
3264*2448 (8M Pix) |
|
The ratio of image |
4:3 |
|
Supporting system |
Windows me/2000/xp/2003/vista;Mac O/S;Linux; |
|
Battery capacity |
200mAh |
|
Working time |
About 70 minutes |
|
Charging voltage |
DC-5V |
|
Interface type |
Φ2.5 4 Pin USB |
|
Storage support |
Nand flash |
|
Battery type |
high-capacity lithium polymer |
package includes:
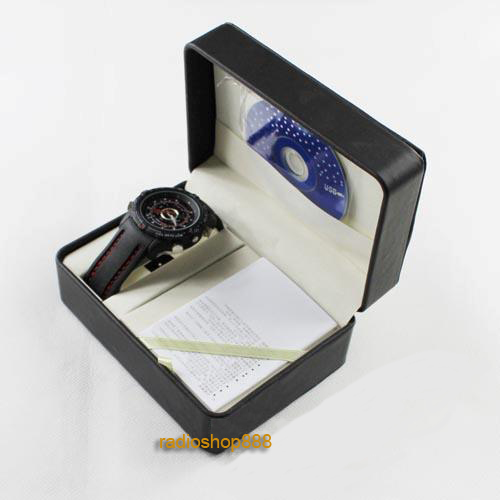
1 x spy watch(4G)
1 X USB Cable
1 x Charge
1 x user Manual
1 x CD drive
Operating :
a. Parts Description:
a.1 Indicator: Status Indicator (7): blue light is the photo taking mode; red light for the video recording mode.
a.2 Button(4): Touch the button for the start.
a.3 Socket(1): The 2.5 – 4 pin USB socket is used to connect with computer or charger. It is the interface for data transfer and charging.
a.4 Microphone and camera: Microphone (2) is used to get the sound signal ;(3) is used to get the image signal.
a.5 Time setting: It is to set the time of this watch.
b. ON/OFF: Press button (4) for 2 seconds to start the device. It gets into the photo recording mode. Meanwhile the blue light indicator is on.
c. Take photo: In the photo-taking mode, the device enters into the standby status for photo-taking. Now the blue light is on. Press the button (6) for 1 second. One flashing blue light indicates that the device completes the photo taking and file saving job. Then it returns to the standby mode.
Note: Make sure there is adequate light in the surrounding and the camera is not blocked by other items. Keep the camera upright and stable. And the object should be more than 50cm from the camera.
d. Record video: In the photo mode , long press operation button 2 seconds, the camera into the video mode , this time the red light flashes, in order to save system power and began recording in about 3S bell, the status indicator light will automatically switch off, this time the video is still at the video mode , and if the state recognized the camera, or a new operation, briefly press the operation button once to stop recording, save the file, this time to resume a long bright blue light.
e. Record sound:sart state, a long bright blue light, short the switch machine key (Figure 4), blue light began to blink, in order to save system power and began recording in about 3S bell, the status indicator light will automatically switch off, short the switch machine to save the and enter the camera recording standby mode, this time a long bright blue light
f. PC camera: Hold down the Operation button (Figure 6), you can connect the device with computer USB interface, you can enter the PC Camera (webcam) mode. In this mode, your camera can be used as a PC camera, with your friends online video chat, take photos, and so on.
Note: According to the computer system configuration or difference, the computer may not detect a camera function by once, if the computer can not enter the camera function, but into a Udisk. Please remove the camera and connect the camera to the computer again; If you are the first time to use the PC camera function on your computer, please install the drivers on the CD or dealers provided. Please connect the data cable to the device at first, then connect the other side to the Computer.
g.Connect the computer: In standby or OFF mode, you can connect the device with the computer. The computer will pop up a removable disk logo. There is an image file directory for: * Disk _REC 100MEDIA. During video recorder and computer transfer data, the blue light flashes rapidly. For the disconnection, please click ‘SAFELY REMOVE HARDWARE’ on the right bottom corner of the task bar. Then click to stop the ‘USB mass storage device’. Unplug the USB. The disconnection completes.
Note: According to the computer or system configuration, there will be slight difference for the time of identifying removable disk. Please be patient. During this period, please do not press the button to avoid the bad impact of computer hardware. If the computer does not identify the removable disk long time, disconnect and reconnect the device. If the computer is unable to identify the hardware yet, make sure your operating system, driver and USB cable are all in normal condition. Please make sure to disconnect the device in accordance with the normal process to avoid the possible damage for computer and recorder.
h.Charge: Connect to computer USB interface or charger. During the charging, the red light flashes slowly. When the battery is fully recharged, the red light stops flashing.
Note: The recorder is with built-in high-capacity lithium polymer battery. The battery is with no memory effect. It can be used and charged at anytime. But for the initial five times of charging, please charge battery to saturation after the battery runs out. It is to activate the battery maximum capacity and maintain the standard working time.
|